

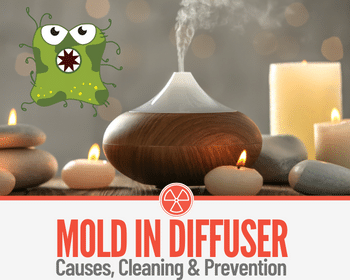
 Has it been a while since you last used your diffuser, and now there’s a musty smell lingering?
Visible signs of mold inside the diffuser and unsure what to do about it?
In this guide, you will learn:
- How to tell if there is mold inside your diffuser
- Most Common Reasons & Best Methods to Clean Mold from Diffuser
- How to prevent further mold infestation in your diffuser
Our diffusers present the ideal conditions for mold to flourish, especially when not cleaned thoroughly or in regular use.
Your diffuser, which you rely on to infuse your air with pleasant aromas, maybe do the exact opposite and harm your health in the process.
Taking care of this issue and preventing its return isn’t too much of a chore.
Luckily, by using our article as a guide, you’ll know how to tackle this musty inconvenience and keep your diffuser fresh every time.
My Diffuser Smells Musty & Has Black Stuff In It- Is It Mold?
The first sign of our microorganism woes is its trademark fragrance.
When you’d hoped to be greeted by wafts of a pleasant aromatic blend of your most refined essential oils and instead been hit by the stench of rotten wood or sweaty socks, you’ll know there is something not quite right.
A visual check beforehand can save your nostrils from experience altogether, like opening up your diffuser will usually confirm the presence of mold or, at least a precursor to it, mildew.
The black stuff in your diffuser is confirmation of contamination, most likely to be black mold.
It is caused by the diffuser not being used for some time and water left in.
Stale water sitting in an enclosed environment alongside a food source for the spores, bacteria in water itself and some essential oils is a breeding ground.
Couple this with the darkness and the microorganisms are left to root and flourish.
This can be prevented by cleaning your diffuser out regularly, especially when you’re aware that it won’t be used for a while.
Mold will grow inside your diffuser over time if left, this could be pink mold, white mold or even black mold, so it’s worth being aware of this potential health hazard and knowing how to deal with it effectively!
Why Does Mold Grow In Diffusers
Mold likes to grow when the following ingredients are in place:
- Moisture
- Temperature
- Food source
In the case of our beloved diffuser, the sealed, dark and wet conditions inside provide the perfect environment.
Being dark and already containing water is a great starting place, as the water droplets can easily condensate within humid and temperate conditions.
Since they are not generally used daily, the water and oils you’re using can stagnate.
It is even better when it gets shut away in a cupboard or unit, as it gets forgotten about for weeks or months.
The bacteria in the water will serve as a food source and any other debris that may have entered; depending on the particular style of diffuser you have, the extraction wick or other materials can be equally as tempting to mold growth.
Signs Of Mold Growth In your Diffuser
Signs that you have mold growing inside your diffuser are as follows:
Smell
There’s a slight musty or damp smell in the room but no visible signs of damp or mold on walls, floors, ceilings or near windows.
When you use your diffuser, the intensity of the aroma increases.
Visible signs
Open up the diffuser; if it appears dirty with black spots or bits floating about there, especially on the internal walls, chances are it’s mold.
White mold or pink mold in your diffuser can be trickier to spot; it could even present itself as a soft, almost silky slime texture on the surfaces inside your diffuser.
Be sure to check the main container and the spout or tip section that draws the infused water out.
If your diffuser uses a wick, you should also check this for visible signs of mold; they may not always be apparent at first, especially white mold on a white wick.
Using a clean cloth, preferably a coloured microfibre such as green or blue will give you a good indication when you open up your diffuser and wipe the inside walls.
Bodily symptoms
You notice allergies after using your diffuser; this could be sneezing, coughing, or general respiratory irritation.
Rashes or itching are also not uncommon from mold exposure.
Suppose you suffer from an underlying health issue or long-standing allergy, especially respiratory conditions such as asthma, COPD or emphysema.
In that case, you may feel the effects of this more so than others in your home.
Diffuser not working effectively
If you’re finding that the diffuser doesn’t appear to be working as well as it once did, it might have become clogged up.
With essential oils getting into the more minor details or mold clusters, it can result in the diffuser functioning correctly.
A thorough clean should rectify this and enable it to run smoothly once again.
Is Mold in Diffuser Dangerous?
In essence, yes, it is, as the spores are being agitated and aerosolized by the diffuser; once released into the air, you and your family will be breathing them in unknowingly.
Each vaporisation method will differ, depending on the type of diffuser you have. Still, all rely on allowing the water infused with oil to become transformed into a fine misty vapour.
Once this has happened, the oil, minerals in the water and any mold spores present will be released into the air to inhale.
Mold is dangerous as it will interfere with your respiratory system, causing health problems or exacerbating underlying issues.
So when you think that your diffuser smells like mildew, it’s something to investigate and deal with.
Allowing yourself and your family to be exposed to mold continually will impact your overall health and lead to symptoms that can easily be confused for seasonal allergies.
This prolonged exposure will be more dangerous, allowing mold to grow and become more widespread. The severity of your body’s reaction can worsen with time.
The toxic load can build up within your body and interfere with many of your bodily systems, creating a more complex health issue to deal with.
We advise dealing with mold in the diffuser at your earliest possible stage to minimise potential harm.
How To Clean Oil Diffuser
Undoubtedly, you’ve been reading how to do this the right way with anticipation.
Read on for our guide to cleaning your diffuser and keeping it in great shape.
It is not advisable to use harsh chemicals or typical household cleaning products such as bleach for your diffuser.
While they may do an excellent job cleaning and tackling any potential mold, they can also interfere with the misting element or contaminate your diffuser so that the chemicals later become vapourised.
Not such a great idea for your health and wellbeing.
With any cleaning procedure, you must first power down the unit, unplug it, and then empty its current contents.
We also advise referring back to the diffusers instruction manual or seeking product-specific cleaning instructions if you are unsure.
You’ll need to know which type of diffuser you must use and clean it effectively.
The main types are:
Nebuliser essential oil diffusers
This diffuser style doesn’t contain water, making mold growth considerably less likely than ultrasonic diffusers.
However, they can still get dirty, clogged or blocked up, causing them not to function well.
Ultrasonic essential oil diffusers
This method’s diffusion relies on the infusion of essential oils into the water, then dispensed into the air.
Due to water use, these are more likely to have issues with mold growth.
They’re also the most common style of the diffuser.
Evaporative essential oil diffusers
Heating; you’ll need to check whether your version uses water or does not since both types are available on the market.
Since evaporative diffusers are not reliant on water, they present a similar scenario to nebulising diffusers.
Once you’ve established which type of diffuser you have, you can proceed to the correct cleaning method for your equipment.
The Best Ways to Clean Your oil Diffuser
1.White vinegar
One of the most straightforward and most accessible cleaning methods.
Head down to the local grocery store and get a bottle of plain white vinegar.
Add a teaspoon or two into freshwater within your diffusers reservoir.
Power it on and allow it to run for 5-10 minutes.
Empty it and use a clean cloth to wipe out the container.
Rinse and dry.
If you need to get into the nooks and crannies, use a q tip whilst the equipment is still moist.
2.Hydrogen peroxide
You can use it as a diluted cleaning agent in warm water; seek out the 3% version.
Dilute with water at two parts water to 1 part hydrogen peroxide.
Conduct the cleaning with a clean cloth and q tips where needed.
Ensure you’re wiping over all surfaces to remove the residue that’s built up.
Rinse out and dry the machine afterwards; it’s now ready to use again.
3.Citric acid
This powder can be added to the water in the reservoir.
It will dissolve limescale and grime build-up.
Mix a tablespoon of citric acid powder into your warm water solution and stir thoroughly until fully dissolved.
Letting the mixture sit in a diffuser for 5-10 minutes can help loosen the grip built up before you power it on.
Run through the diffuser to clean it for another 5-10 minutes.
After this, you should rinse with clean water, wipe with a clean cloth and use a q tip where necessary to get into grooves and areas where the fabric may struggle to clean effectively.
4.Rubbing Alcohol (isopropyl alcohol or surgical spirit)
This practical cleaner is best used to clean the ultrasonic element.
Saturate a clean cloth or q tip with the liquid and gently wipe the disc.
Be sure to get around it; a quick visual inspection should confirm success.
Cleaning Vitruvia diffuser
As per the manufacturer’s website recommendations, you should clean using one teaspoon of white vinegar in a half-filled reservoir.
To do this, empty whatever water and oil residue that you have in your vetruvi diffuser still.
Wipe the inside of your reservoir with a clean damp cloth, then add in the fresh water and vinegar mix.
Please turn it on and allow it to run for around 5 minutes.
After which, you should empty whatever may be left, wipe down and refill with fresh water and oil blend of choice.
Anjou diffuser cleaning
This manufacturer recommends using baking soda to clean their diffusers; to do so, you’ll first want to empty the reservoir of old water and oil.
Next, add in 3-5g of baking soda
Then fill the reservoir around halfway with warm water and allow it to sit for about 5 minutes, ensuring the baking soda is thoroughly mixed and dissolved into the water.
Stir it in using a spoon or stirrer if needed.
Use a clean cloth or soft scrubbing brush to thoroughly clean the equipment, then rinse under the tap before drying.
If you’re uncertain about steps or a particular diffuser model, please refer to the manufacturers’ instruction manuals.
How Often Should You Clean Your Diffuser?
Ideally, daily is the shortest answer; this ensures that the chance for mold growth is minimal.
Even if the daily or regular cleanout focuses on a water change and a wipe to remove residue inside the unit, this should be sufficient to keep the mold at bay.
Regular cleaning of your diffuser should only take a short amount of time, and the health benefits from doing so will outweigh the inconvenience of having to do it.
If regularly, a more rigorous cleaning protocol should be carried out 1-2 times per week.
If you’re more of an infrequent user, we recommend cleaning the diffuser well and drying it thoroughly before leaving to sit or packing it away.
This not only will keep the diffuser in good shape and mold-free but also means when you go to use it the next time, it’s ready to go.
Preventing Mold Growth In Your Diffuser
To prevent mold from growing in your diffuser, we recommend the following steps:
1.Use distilled water in your diffuser
The use of distilled water instead of tap water is helpful as the distilled water is purer and doesn’t contain as many contaminants.
Resulting in fewer food sources for the mold spores. Overall, it is easier to clean as your water produces less limescale.
Filtered water or bottled is also a step in the right direction if you don’t have access to distilled water.
2.Select suitable oils to diffuse
Certain oils such as tea tree, lemongrass, or cinnamon oil are naturally anti-fungal / anti-bacterial. Using these in your diffuser will prevent mold from growing there in the first place.
They also smell amazing, so that they will enhance your living space.
Oils can be blended to create your fragrance; if you’re going to explore this route, we’d suggest checking out some guidance from the supplier or suitably qualified people to get the most from them.
3.Regular use of your diffuser
When used regularly, the water and oil inside the diffuser will be getting used up and changed so it won’t get the chance to become stagnant.
Also, you’ll be opening the unit and hopefully keeping an eye on the overall condition inside, which will alert you to any early signs.
4.Proper storage of your oil diffuser
When the diffuser is not in use, it should be stored in an empty, clean & dry condition.
Doing so ensures that old stale water and food sources for bacteria are not present.
5.Regular cleaning of your diffuser
Getting into the habit of cleaning your diffuser after each use is the ideal system to strive for.
This regular cleaning would be involved emptying the contents from inside the reservoir.
You are wiping the insides of your machine and allowing it to dry before reassembly.
A more thorough deep clean should also be carried out at periodic intervals.
See our section about cleaning to establish the exact methods for doing so.
6.Prevent foreign materials or debris from getting into your diffuser
Being vigilant and not letting debris get into your unit will also help keep any mold related issues at bay.
This is as simple as it sounds.
Check water added hasn’t got anything floating in it.
When the reservoir has been opened, check to mensureyou’ve not dropped anything in there before putting the lid back on.
This last point is especially true if you have animals or children in your home; curious hands or paws can quickly introduce materials into the mix that wouldn’t usually be an item to be wary of.
Do Diffusers Cause Mold In Home?
In most instances, a diffuser will not lead to mold infestation in the home.
This isn’t to say that it’s impossible, just that for it to do so, a few things would need to happen for this scenario to ring true.
Firstly the diffuser would need to contain water and mold spores, having been sat for some time.
When operating the diffuser, it will be dispensing these mold spores throughout your room. Should the conditions be appropriate for them to find a new home and propagate, then it is possible they can set up a home someplace else.
If you had black mold in a diffuser, it must be addressed immediately.
The same goes for any colour: white mold in a diffuser or pink mold in a diffuser.
They’re all equally as undesirable to discover.
Another way mold in your diffuser could get into your home is for the diffuser would need to fail somehow and allow the contents to seep out the contaminated water.
This mold infused cocktail would then need to be left for the mold to colonise on its new home, which could be carpet, soft furnishings or other materials it enjoys.
It was made more likely in cupboards, wardrobes or drawer units where it could be left undisturbed for some time.
It is also possible that rather than the diffuser unit developing a fault, it tips over when in its storage location.
Outside of these scenarios, the likelihood of a single diffuser being used regularly is improbable.
Yes, they diffuse the water into an excellent mist vapour, but it does not create enough to warrant being a problem.
As the vapour is so delicate and dissipates into the atmosphere readily.
However, setting up multiple large units and running them continuously with no ventilation in a room may create a problem over time.
The likelihood of anyone doing this is minimal.
Broken extractor fans, the faulty building fabric, and many other issues would be more likely to create a problem with mold.
How To Choose A Diffuser That Will Be Easy To Keep Mold-Free
When you’re at the stage of shopping around for an essential oil diffuser, a good starting place is always going to be online shops and platforms that have reviews from actual customers.
This can highlight any potential issues with a design or model in advance, so you don’t have to experience them yourself.
It saves you a ton of time, hassle and potential health implications in the process. It can also be helpful to talk with friends or colleagues that may own one.
Using your initiative and viewing images of how the item could be taken apart, you’ll be able to see any potential flaws in the design or areas where mold could be a problem.
Asking the seller questions about cleaning protocols can also prove helpful.
Also, assess how easy the machine is to take apart for cleaning; if it’s tricky or complex, it can lead to laziness and leave the diffuser to sit for prolonged periods between cleans.
We hope this article has proven helpful for you.